Installation Tips for a Wudu Basin for Muslim Homes and Prayer Areas

Installation Tips for a Wudu Basin for Muslim Homes and Prayer Areas
Installing a wudu basin requires careful planning to ensure convenient use, reliable plumbing, effective drainage, and easy maintenance. Whether the basin is being added to a home bathroom, a dedicated prayer room, or a shared ablution area, the installation should suit the available space and the needs of the people using it. Proper preparation can also help prevent water leaks, reduce splashing, and protect surrounding floors and walls from moisture damage.
Choosing the right Wudu Basin for Muslim households and prayer areas is only the first step. Its position, mounting height, water supply, drainage connections, and surrounding floor design all affect everyday usability. By considering these factors before installation begins, homeowners and facility managers can create an ablution space that is practical, comfortable, and straightforward to maintain.
1. Measure the Available Space Before Buying
Accurate measurements help determine which basin style will fit the intended location without obstructing movement. Begin by measuring the width and depth of the installation area, along with the distance between nearby walls, doors, fixtures, and walkways.
Consider the space needed for users to approach the basin comfortably and move their arms while washing. In a small bathroom, a compact wall-mounted or corner basin may be suitable. A larger prayer area may accommodate multiple washing stations or a wider basin with additional surrounding space.
Before ordering a basin, check the manufacturer’s dimensions and installation drawings. Remember to account for the faucet, plumbing connections, mounting brackets, and any countertop or support structure.
2. Choose the Most Suitable Basin Style
Different basin styles offer different advantages, so the best option depends on the room layout and intended use.
Wall-Mounted Wudu Basin
A wall-mounted basin can save floor space and create a clean, uncluttered appearance. It can also make floor cleaning easier because the area underneath remains accessible.
However, the wall and mounting hardware must be capable of supporting the fixture safely. Confirm the required reinforcement and installation method before drilling or attaching the basin.
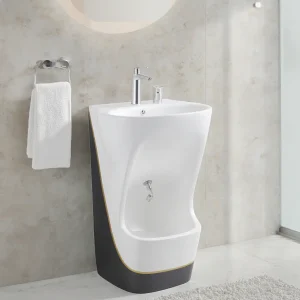
Floor-Standing Basin
A floor-standing model may provide a substantial appearance and can be suitable where the design requires a freestanding fixture. Its footprint should be checked carefully to ensure that it does not restrict access or create obstacles.
Countertop or Integrated Basin
A countertop basin can work well in a dedicated ablution room with sufficient surface space. An integrated basin may reduce visible joints around the washing area, depending on its construction.
Whichever style you choose, make sure its shape, depth, and faucet position allow comfortable washing while limiting unnecessary splashing.
3. Select an Appropriate Installation Height
Basin height affects comfort and accessibility. A basin that is too high or too low can make washing inconvenient, especially for children, older adults, and people with limited mobility.
For a household installation, consider the height of the main users and the way the basin will be used. In shared prayer areas, it may be beneficial to provide different station configurations where space allows.
Do not rely on a single standard height for every situation. Review the product’s installation instructions and applicable accessibility requirements before finalizing the mounting position.
For wall-mounted models, mark the proposed height on the wall and check the position while considering the basin’s overall dimensions. Verify that the faucet controls remain easy to reach and that the drain connects correctly to the existing plumbing.
4. Check Water Supply and Plumbing Connections
Reliable water supply is essential for daily ablution. Before installation, inspect the existing plumbing to confirm that the water lines, valves, and connections are compatible with the selected basin and faucet.
Important checks include:
- Confirming the location of hot and cold water connections, if applicable.
- Checking that shutoff valves are accessible for maintenance.
- Selecting compatible faucet fittings and connectors.
- Ensuring that pipes are securely supported.
- Checking the manufacturer’s recommended water pressure and connection sizes.
If the basin is being installed in a new location, additional pipework may be required. Have a qualified plumber assess the route and determine whether modifications are needed.
After connecting the water supply, inspect all joints for leaks and test the faucet before completing the surrounding finish work.
5. Plan Drainage to Prevent Standing Water
Effective drainage is one of the most important parts of a wudu basin installation. Water should leave the basin efficiently without persistent pooling or leakage around the drain.
Check that the drain outlet matches the plumbing connection and that the trap is installed correctly. The pipework should follow the appropriate slope and local plumbing requirements to allow wastewater to flow reliably.
For an ablution area where water may reach the floor, the overall floor design also matters. A suitable floor slope, properly positioned drains, and slip-resistant surfaces can help reduce standing water.
Do not assume that a basin drain alone will manage all splashing. In busy or frequently used washing areas, a floor drain may be needed as part of the wider drainage plan. A qualified plumber or contractor can assess the requirements for the specific room.
6. Prepare the Wall and Floor Properly
The surrounding surfaces should be ready for repeated exposure to moisture. Before fitting the basin, inspect the wall for damage and confirm that it can support the chosen fixture.
For wall-mounted basins, install the specified brackets, anchors, or structural reinforcement. Do not attach a heavy basin to an unsuitable wall surface without the required support.
Water-resistant wall finishes can help protect the area behind the basin. Suitable tile, sealed surfaces, or other materials intended for wet environments may be appropriate, depending on the room design.
The floor should also be durable and easy to clean. In areas where splashing is expected, choose a surface with suitable slip resistance when wet. Ensure that joints and transitions are finished properly to limit water penetration.
7. Seal Joints and Connections Carefully
Correct sealing helps prevent water from entering gaps around the basin or damaging surrounding materials. Follow the manufacturer’s instructions for sealing the basin against the wall or countertop.
Use a sealant that is compatible with the basin material and suitable for bathroom or wet-area conditions. Applying too much sealant or using an incompatible product may affect the finish and make future maintenance more difficult.
Allow sealants and adhesives to cure for the recommended period before using the basin. During this time, avoid exposing the installation to water if the product instructions require it.
Sealing should not be used as a substitute for proper structural support or correctly fitted plumbing connections.
8. Position the Faucet to Reduce Splashing
Faucet placement influences how comfortably users can wash and how much water reaches the surrounding surfaces. The outlet should direct water into the basin rather than onto its rim or nearby walls.
Consider the relationship between faucet height, water flow, basin depth, and bowl shape. A faucet that is too high may increase splashing, while one that is poorly positioned can make the washing area difficult to use.
Choose controls that are easy to operate and maintain. In shared prayer areas, durable fittings and accessible shutoff valves can make routine servicing easier.
Once installed, test the faucet at different flow levels and adjust the water pressure where necessary and permitted by the plumbing system.
9. Consider Accessibility and User Comfort
An ablution area should accommodate the people who will use it. For homes, consider the needs of all household members. For prayer rooms and community facilities, include accessibility in the initial design rather than treating it as a later adjustment.
Useful considerations include:
- Adequate space to approach and use the basin.
- Controls that are easy to reach and operate.
- Suitable basin height for the intended users.
- Stable seating or support features where appropriate.
- Clear walkways without unnecessary obstacles.
- Slip-resistant flooring and effective drainage.
Where accessible facilities are required, follow local building codes and accessibility standards. A professional installer can help confirm the required clearances, support arrangements, and fixture heights.
10. Choose Materials That Suit the Installation Area
The basin material affects cleaning, durability, and installation requirements. Ceramic and porcelain are common choices because their glazed surfaces are generally easy to clean. Solid-surface materials can provide a modern appearance, while stainless steel may be appropriate for functional, high-use settings.
Natural stone can create a distinctive finish but may require sealing and specific cleaning products. Always confirm the care instructions for the selected material.
Also check the weight of the basin before installation. Heavy fixtures may require stronger support, different mounting hardware, or additional reinforcement. Make sure the installation method is approved for the particular product.
11. Test the Basin Before Regular Use
Once the basin has been installed, carry out a full inspection before using it routinely.
First, run the water and check all supply connections for leaks. Fill the basin partially, then release the water to confirm that it drains properly. Inspect the drain, trap, and surrounding seals for signs of leakage.
Check that the basin feels secure and does not move when used normally. Confirm that the faucet controls work correctly and that water flows into the bowl without excessive splashing.
Finally, inspect the surrounding floor and wall for unexpected moisture. If you notice loose mounting hardware, poor drainage, or leaking connections, address the issue before the basin enters regular use.
12. Avoid Common Installation Mistakes
Some installation problems can be avoided through careful preparation and attention to the manufacturer’s instructions.
Common mistakes include:
- Choosing a basin before measuring the available space.
- Installing a wall-mounted model without suitable structural support.
- Positioning the drain or faucet incorrectly.
- Ignoring floor drainage in areas exposed to frequent splashing.
- Using sealants or cleaning products incompatible with the basin material.
- Blocking access to shutoff valves and plumbing connections.
- Failing to test the basin for leaks before completing the project.
Taking time to check these details can help prevent repairs and improve the long-term performance of the installation.
13. Establish a Simple Maintenance Routine
Regular maintenance helps keep the basin hygienic and reduces the likelihood of plumbing problems. Clean the bowl, faucet, and surrounding surfaces using products suitable for the material.
Inspect the drain periodically for hair, debris, or residue that could slow water flow. Check seals and plumbing connections for leaks, and tighten or replace components only as recommended by the manufacturer.
In shared ablution areas, more frequent cleaning may be necessary because of higher usage. A simple maintenance schedule can help staff identify problems early and keep the facility ready for worshippers.
Avoid abrasive cleaners or harsh chemicals unless the manufacturer confirms they are safe for the basin’s finish.
Conclusion
Installing a wudu basin in a Muslim home or prayer area involves more than selecting an attractive fixture. Accurate measurements, appropriate mounting height, reliable plumbing, effective drainage, secure support, and suitable surface finishes all contribute to a comfortable and dependable installation.
Before beginning the project, review the basin’s specifications and plan the plumbing and surrounding space carefully. Use qualified professionals for plumbing, structural mounting, and wet-area work where needed. With proper installation, careful testing, and regular maintenance, a wudu basin can provide a practical and hygienic space for daily ablution over the long term.